
As the official partner of Coachella for 2018, Sephora has some serious insight on exactly which beauty looks will be trending on festival grounds this year. So, what can you expect? A whole lot of glitter, color, and hair accessories. And, if you’ll be making the trip out to Coachella this month, you too can stop by the Sephora tent to try one of the below styles from one of their hair experts. Not making the trek? No worries. Here’s a breakdown of how to create each look for yourself, plus key products used for each one so you won’t have to miss out on all the festival fun.
1. Bold Color Curls
Maybe you’re not down with the maintenance required for permanent, bold hair color, so instead, try a temporary version that is just as vibrant and washes out after one use. To get this look, first style and dry your hair as usual. Then, grab a two-inch section of hair and hold it at the ends with your fingers. Spray the curls from roots to ends with a color spray in the shade of your choice. Repeat this step all over your head, alternating shades with each section to get an even mix of color.

L’Oreal Colorista Temporary Hair Colour Spray, @desertcart.ae, Dhs166
2. Dark Mermaid Vibes
For a braided look like this, split your hair down the middle into two halves. Focus on one side at a time and clip the other half out of the way. Then, section off the front third of your hair (the bang section), from your middle part all the way down to your ear and spray it with the first color. Next, take the middle section of your hair and spray it with the second color. Then, finish with the last section at the back of your head, coating it with the third color. Brush your hair out gently to blend the colors, and then begin braiding as normal for a cool rainbow braided finish.

4. Sunset Hair
For this pink-to-yellow-to-red gradient effect, start by spraying the top third of your hair at the roots with a pink spray. Then, switch to yellow on the middle section of the hair, layering the color slightly over the end of the pink section to create an ombré effect. Finish by spraying your ends with the red shade, blending the color into the yellow.

5. Punked Up Braids
If you have fine, slick hair that slips out of braided styles easily, prep your hair first with texture spray to give it grip. For this particular style, section off one side of your hair, clipping it up so it’s out of the way, while you braid the other side. Begin French braiding your hair, but instead of bringing the sections forward and over to braid, pull the section under and back (this creates an inverted braid that looks more 3D). After you’ve braided to the ends and secured it with a small band, use rings (or in this case, paper clips) to decorate your braid.

Tresemme Texture Style Devine Definition Spray, @souq.com, Dhs19
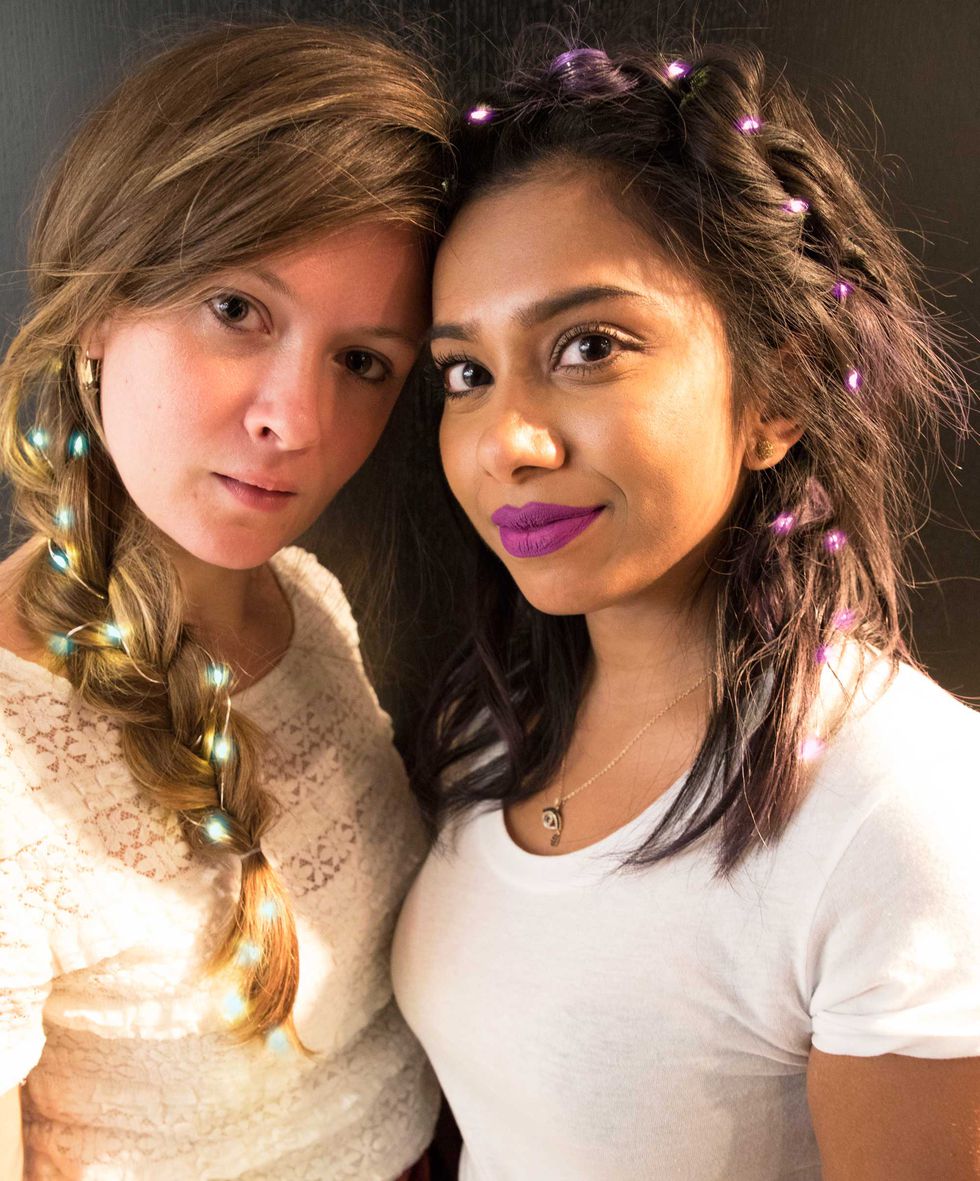
6. Fairy Braids
This accessorized braided look features something you might not have ever thought to put in your hair: fairy lights. To create a solid base for this look, you’ll need to create a lot of texture and grip in your hair. To do so, layer a texture spray and a dry shampoo from roots to ends and work the products in with your finger tips. Next, section off the top half of your hair from ear to ear and clip it up and out of the way. Then, grab a 3-inch section of hair from the center of the back of your head, tying it off with a rubber band to create a small ponytail. This will serve as the anchor for your fairy lights. Use a bobby pin to clip the small battery pack into the small pony. Next, let down the top section of your hair and begin braiding it, incorporating the strand of fairy lights as you braid. Tie off the end, and switch on the lights to see it twinkle.
Battery Powered LED String Light Waterproof Fairy Lights, lightinthebox.com, Dhs6.77
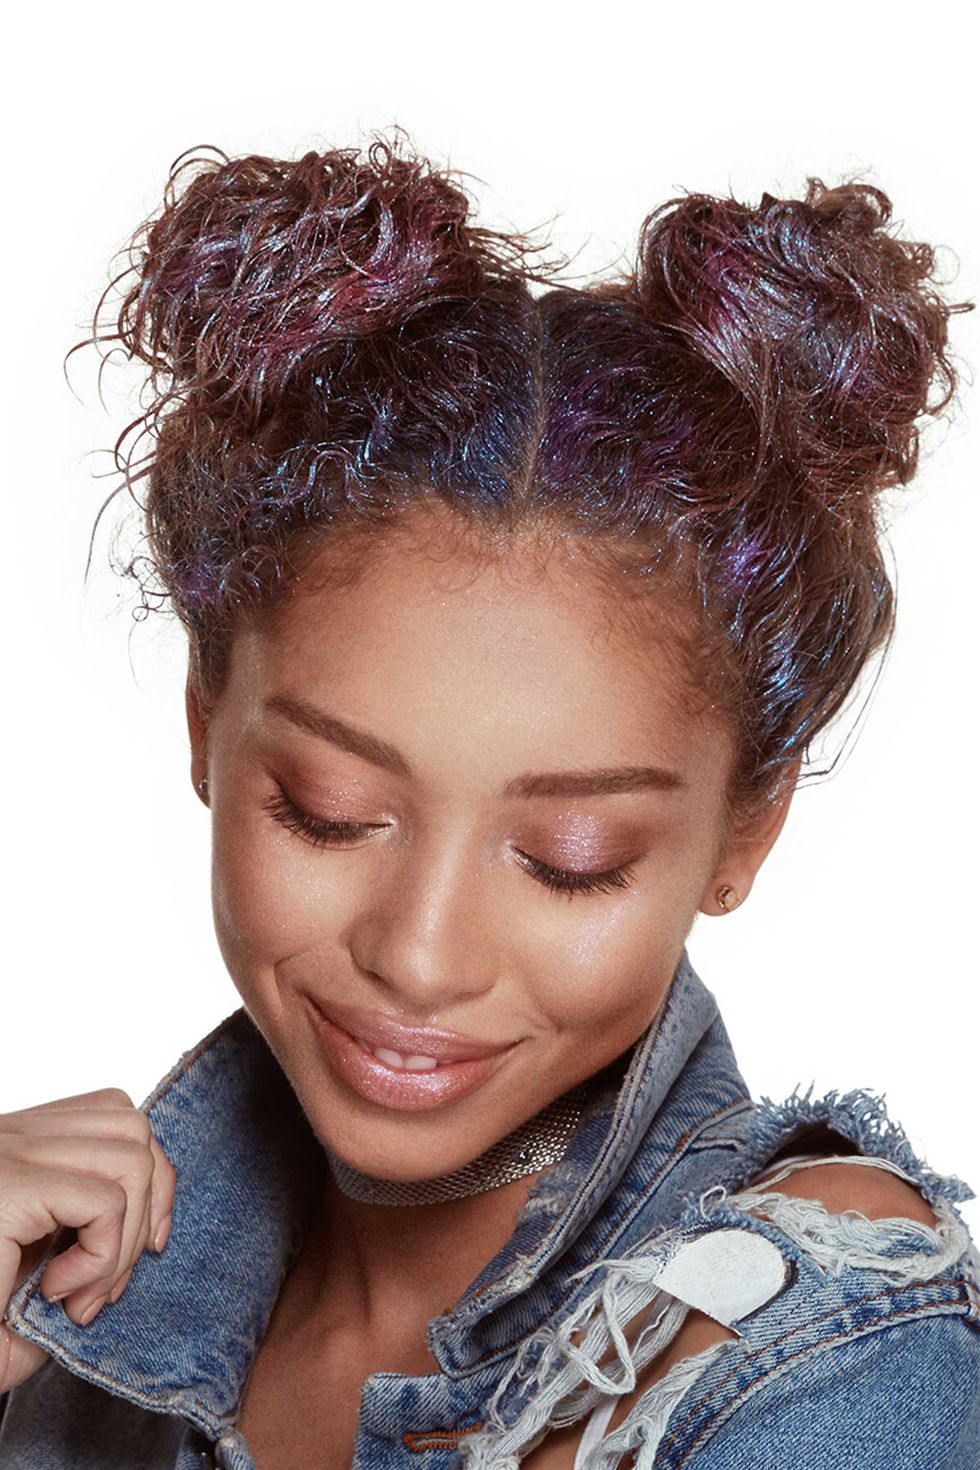
7. Glitter Space Buns
For this galactic look, first, section your hair into two equal halves and secure them in two high buns. Next, mix a loose pearlescent pigmet eyeshadow mix a pearlescent loose pigment eyeshadow with a hair styling foam or gel. Apply it to your roots with a flat foundation brush for an even fill. Slather the glitter mixture on your hands to scrunch and press it onto your buns.
NYX Professional Makeup Loose Pearl Eyeshadow, @desertcart.ae, Dhs35
8. Princess Crown Braids
For glittery crown braid, start by parting your hair down the middle in the back. Next, start on one side at the nape of your neck and begin creating an inverted French braid (weave the pieces under rather than over, using the same French braid technique) until you reach the front of your head. When you reach this point, switch to a 3-strand braid and continue to the ends of the hair. Repeat this process with the other half, starting at the nape of your neck again, braiding it all the way to the ends. The two braided tails should now be at the front of your head. Once they’re both secured, wrap them around the crown of your head and pin them in place to hide the tail ends. To add the glitter, use a makeup brush to paint on some glitter foam/gel mixture over the braided sections, or use loose glitter for a royal bejewelled effect.
